VIII. Setup OpenSSO
This is the guide to deploy OpenSSO with Docker. Make sure you have already done to follow all the steps from previous guides.
- OpenSSO support to deploy with Docker since version 1.2.0.
1. Pre-request Install
Before we going to setup OpenSSO. If you read all the previous guides, make sure you have already installing:
- PostgreSQL
- Redis
- Nginx
- Docker
- Mailserver (inside docker)
From a lot of literature that I've read, for production mode,
PostgreSQL, Redis and Nginx are better should not installed inside the Docker.
2. Restore Database
This guide is already explained at here but I'll explain more spesific here.
a. Download DBeaver
If you still on SSH, now exit from it.
We will download a software database client on our PC/Desktop.
I will use this software to restore the file db.postgre.sql into our PostgreSQL database.
Here is the link to download dbeaver.
You are able to use the other software than DBeaver.
There is pgAdmin, Navicat, HeidiSQL, etc. Actualy this is up to you.
b. Create Connection
After you finished install DBeaver.
Now open it and let's make a connection to the database.
Go to Tab Menu Database and choose New Database Connection.
Or you can just open it using shortcut key by press CTRL+SHIFT+N.
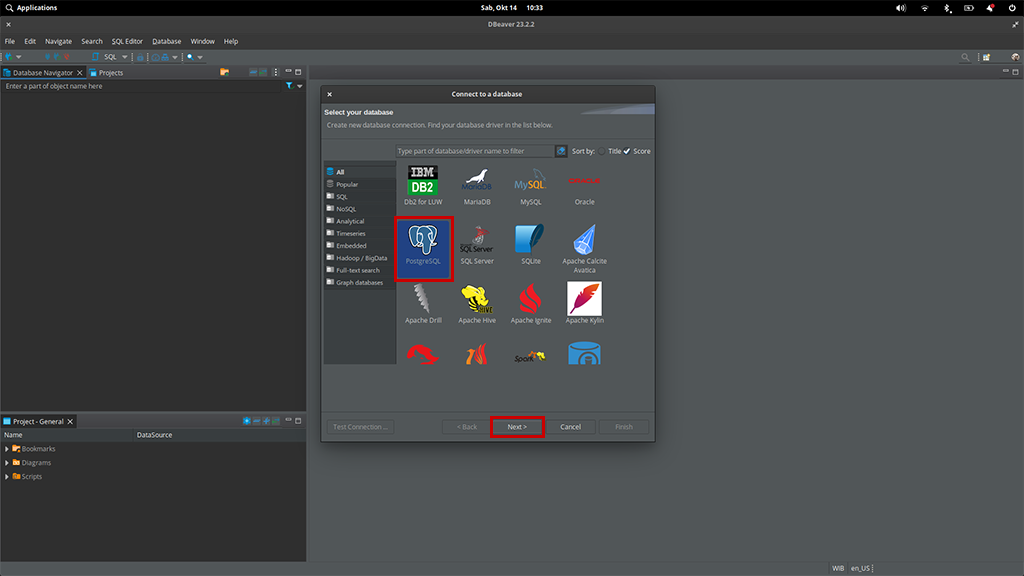
You will see this, just choose PostgreSQL and then click Next.
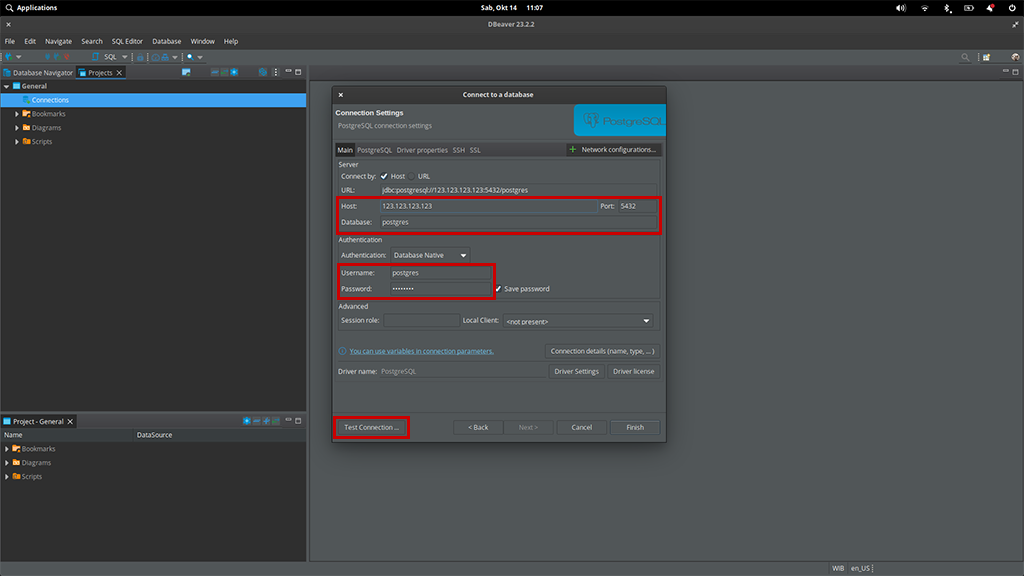
Now edit the Host and Password then click Test Connection button,
if you follow this PostgreSQL guide, then your configuration will look like this.
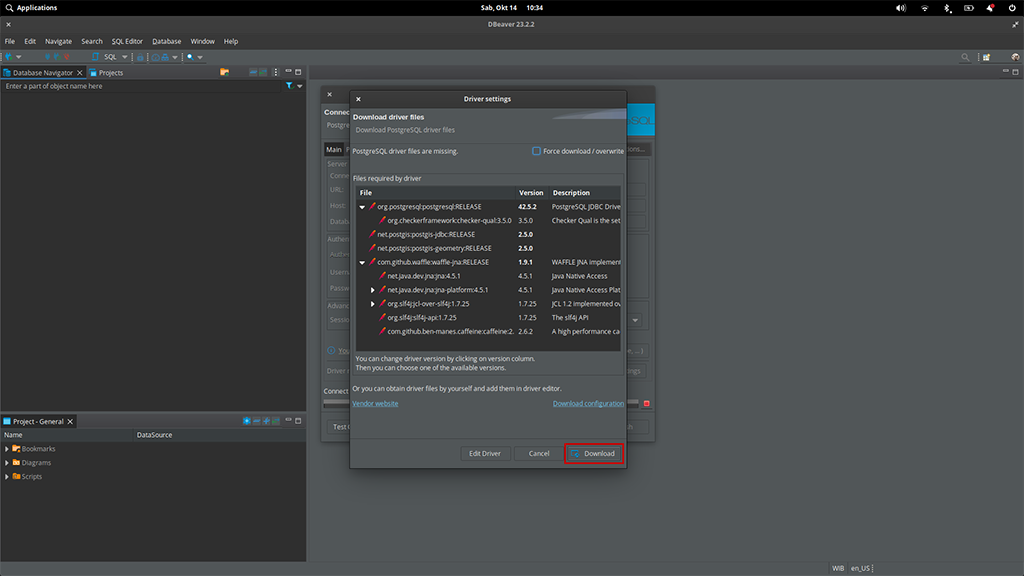
If you are first time using dbeaver, maybe you will asked to download PostgreSQL driver files.
Just click Download button and wait until finished.
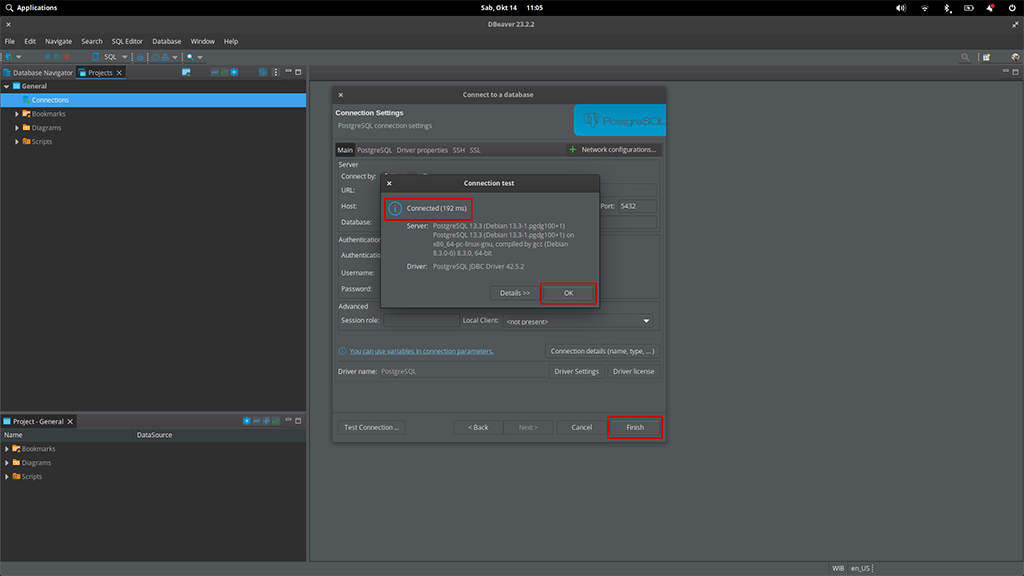
If the Connection Test Successfully Connected, just click OK and then click Finish button.
Now you can check it if your database table still empty.
c. Execute SQL
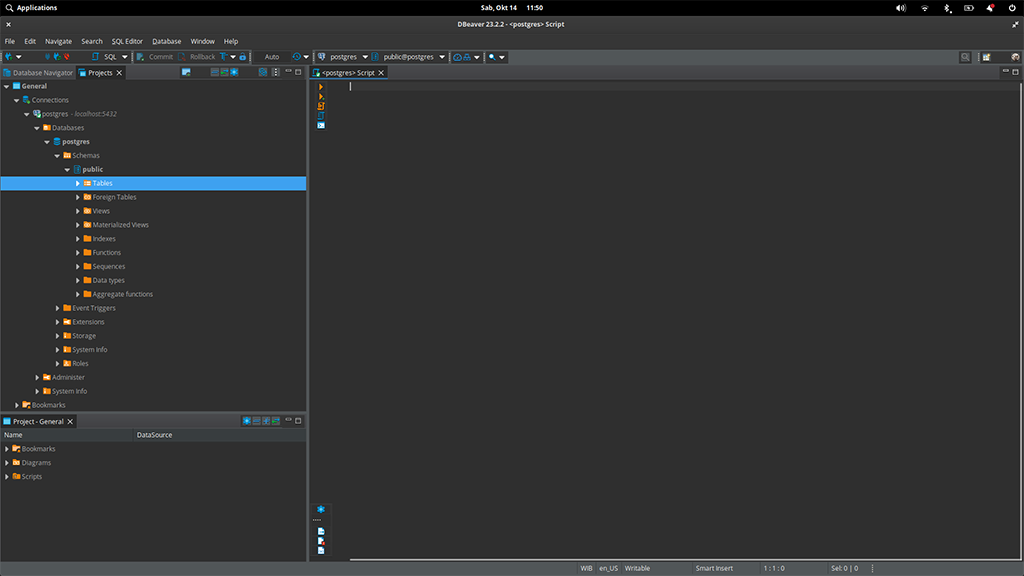
Now press F3 to open SQL Editor.
Now Right click on SQL Editor, then choose File >> Import SQL Script.
Then choose the db.postgre.sql, it is located at your opensso/database directory.
Then click Open.

You will the the SQL will fill the SQL Editor at the right side.
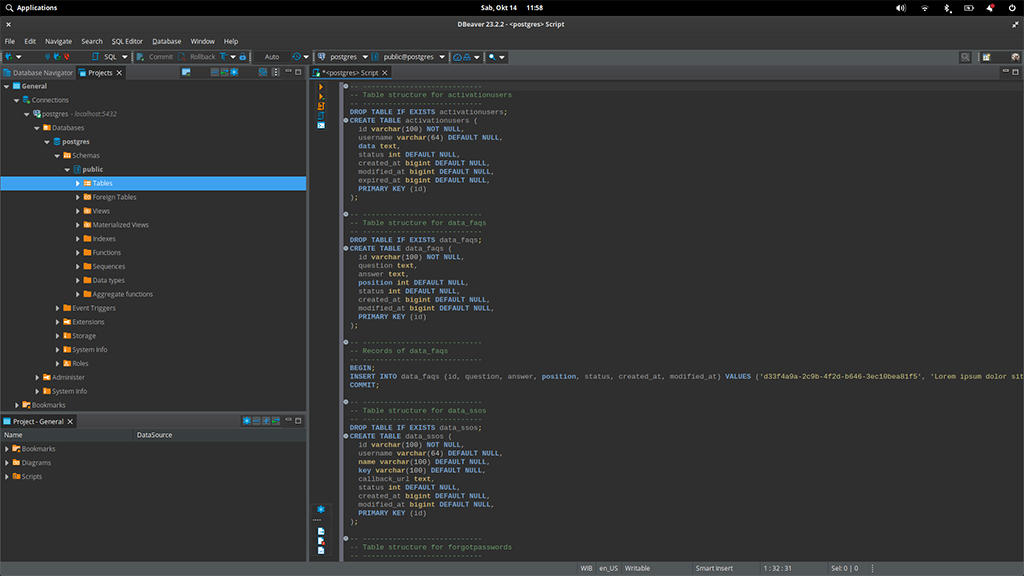
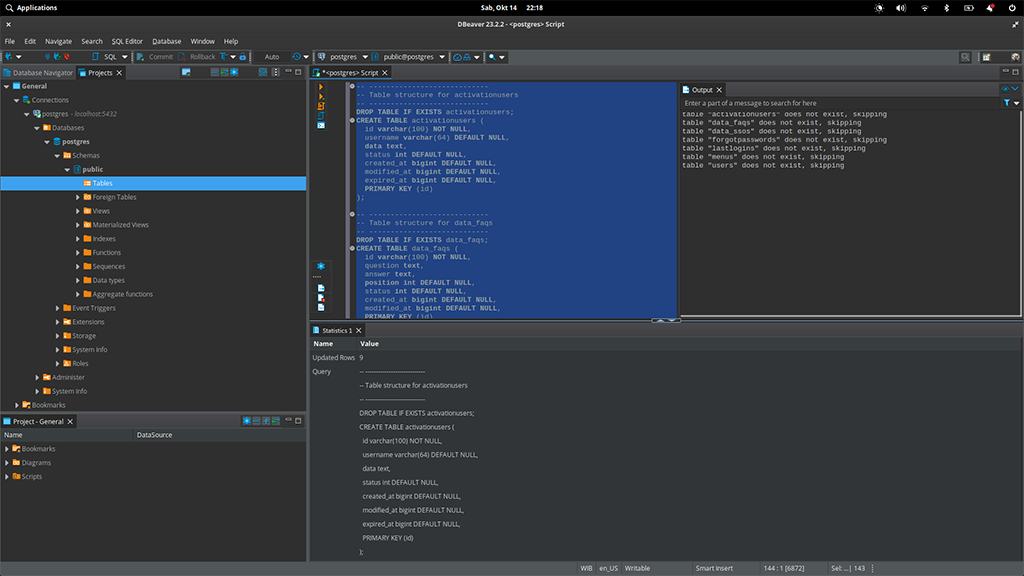
Now Select All on the SQL Editor then press CTRL+ENTER.
It will generate all the tables for OpenSSO.
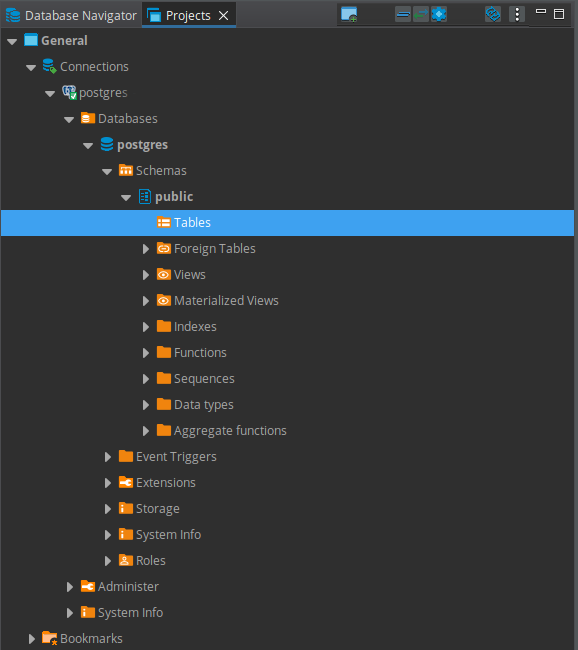
You can see your tables from the left panel,
just right click on Tables and choose Refresh.
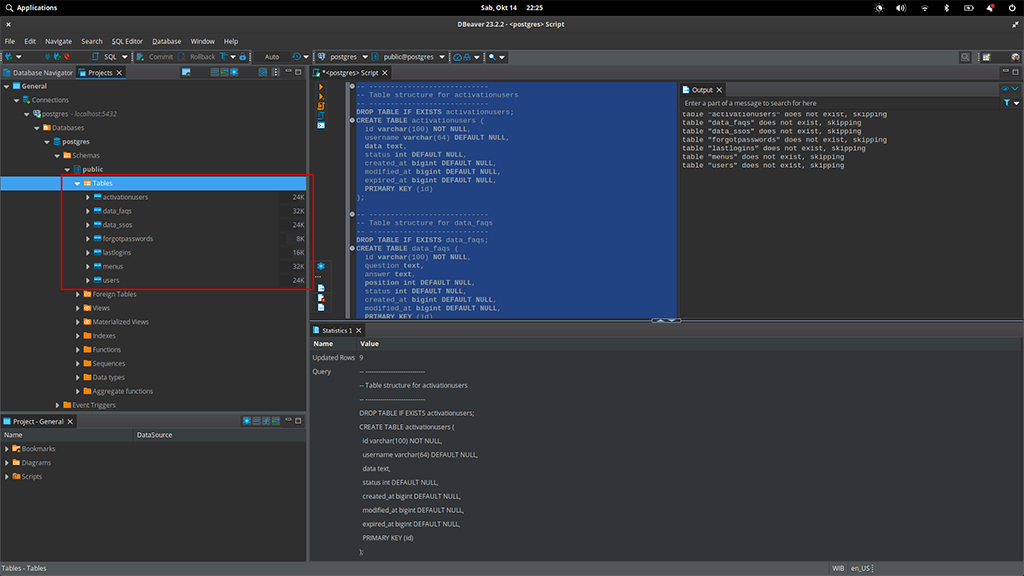
Now the database server for OpenSSO is ready to use.
You can close the DBeaver and continue to the next step.
3. Configure OpenSSO
Before we deploy OpenSSO to our Docker.
Let's we configure the config.js.
To make easier editing code, please use VSCODE.
Because we will edit the config.js on our PC/Desktop,
before uploading it to Ubuntu Server.
a. Extract open-sso-1.5.0.zip
The OpenSSO version when writing this guide is 1.5.0.
You should adjust it if there is any updates from OpenSSO.
When you buy the OpenSSO from CodeCanyon, you got it file as a zipped.
You have to extract it with default folder name open-sso-1.5.0.
Let's rename it folder from open-sso-1.5.0 become opensso.
Now go to inside the opensso directory.
Then you will found config.js, which is located inside the opensso directory.
b. Set Connection Database
This configuration is following the PostgreSQL Guide.
const config = {
  // ---
  sequelizeOption: {
    dialect: 'postgres', /* one of 'mysql' | 'mariadb' | 'postgres' | 'mssql' */
    dbname: 'postgres',
    username: 'postgres',
    password: 'yourpassword',
    options: {
      host: '172.17.0.1',
      port: '5432'
    }
    // dialect: 'sqlite',
    // storage: './database/data.sqlite3'
  },
  //---
}
- password - please change
yourpasswordwith yours. - options.host - postgresql database is outside of docker network, change it to
172.17.0.1.
c. Set cache using Redis
This configuration below is following the Redis Guide.
const config = {
  // ---
  cache: {
    namespace: 'fastify',
    engine: 'redis',
    redisConn: 'redis://youruser2:[email protected]:6379',
    ttl: {
      master_data: 3600,
      public_profile: 3600, // cache will auto release in 1 hour.
      total_user_month: 3600,
      total_user_year: 3600,
      total_user_active: 3600,
      total_user_inactive: 3600,
      total_user_list: 3600,
      menu_parent_list: 3600,
      menu_parent_group_list: 3600,
      menu_parent_role_list: 3600,
      menu_parent_role_list_grouped: 3600
    }
  },
  //---
}
- engine - please change with
redis. - redisConn - please change it like
redis://username:[email protected]:6379.
Change youruser2 and user2pass with yours.
Stay using ip 172.17.0.1, because redis need low latency by using local ip from docker.
d. Set Mailer
This configuration below is following the Mailserver Guide.
const config = {
  // ---
  useMailer: true,
  logoEmail: 'https://i.imgur.com/UJYGvee.png',
  recipientEmailAddress: '[email protected]',
  nodeMailerTransport: {
    pool: true,
    host: 'mail.yourdomain.com',
    port: 465, // 465 (SSLTLS) or 587 (STARTTLS)
    secure: true, // 465 is true, 587 is false
    auth: {
      user: '[email protected]',
      pass: 'yourpassword'
    }
  },
  //---
}
- useMailer - should set to true, if set false then opensso mailer will not work.
- logoEmail - you can change this default logo for email with yours.
- recipientEmailAddress - put your email address, all message from contact page will delivered to here.
- nodeMailerTransport.host - change
mail.yourdomain.comwith yours. - nodeMailerTransport.port - is the smtp port, use 465 or 587.
- nodeMailerTransport.secure - is the secure connection, set to true if you're using port 465.
- nodeMailerTransport.auth.user - change
[email protected]with yours. - nodeMailerTransport.auth.pass - change
yourpasswordwith yours.
e. Set Template
OpenSSO is having 2 templates, it is default and inverse theme.
These two templates is having same design but only different in colors.
Default Theme It is Light as default, but you can switch to Dark Blue.
Inverse Theme It is Dark as default, but you can switch to Light.
const config = {
  // ---
  templateDir: 'default',
  // ---
}
- templateDir - you can change this from
defaulttoinverseif you want to use dark theme.
f. Set Website
Now we have to set the website information.
const config = {
  // ---
  baseUrl: 'https://sso.yourdomain.com',
  baseAssetsUrl: 'https://sso.yourdomain.com',
  siteName: 'OpenSSO',
  siteTitle: 'An Open Single Sign On to make easier sign-in to all of your applications.',
  siteDescription: 'An Open Single Sign On to make easier sign-in to all of your applications.',
  authorName: 'M ABD AZIZ ALFIAN',
  authorWebsite: 'https://linktr.ee/aalfiann',
  authorEmail: '[email protected]',
  startYearCopyright: 2022,
  webmaster: { // Just leave blank if you don't want to use this
    google: '', // Get the verification id at >> https://www.google.com/webmasters
    bing: '', // Get the verification id at >> https://www.bing.com/toolbox/webmaster
    yandex: '' // Get the verification id at >> https://webmaster.yandex.com
  },
  tracker: {
    googleAnalyticsID: '' // Get GA tracker id at >> https://analytics.google.com
  },
  social: [ // name must be same as icon code >> https://fontawesome.com/v5/search?o=r&m=free&f=brands
    { name: 'twitter', link: 'https://twitter.com/aalfiann' },
    { name: 'github', link: 'https://github.com/aalfiann' },
    { name: 'gitlab', link: 'https://gitlab.com/aalfiann' }
  ],
  // ---
}
- baseUrl - please change
https://sso.yourdomain.comwith your website - baseAssetsUrl - please change
https://sso.yourdomain.comwith your website or CDN.
That is the important part, you can update the rest information later.
g. Upload to Ubuntu Server.
If you already finish to configure OpenSSO.
You should zip it back again with name opensso.zip.
Now you can use FileZilla, WinSCP, etc. to upload opensso.zip.
4. Setup OpenSSO
You already successfully upload opensso.zip to your Ubuntu Server.
Now you should login to your Ubuntu Server using SSH
Terminal
sudo ssh [email protected] -p2292
If you're on windows, you can use Putty.
a. Extract it
We will need to install unzip.
apt install unzip -y
Now you can extract opensso.zip to /srv/.
Make sure you still in the same directory of opensso.zip.
Then extract it to /srv/opensso/.
unzip opensso.zip -d /srv/opensso
So now the directory /srv/ will be look like this.
├── srv
│   ├── mailserver
│   └── opensso
and the inside directory opensso should be look like this.
├── srv/opensso
│   ├── changelog.md
│   ├── config.default.js
│   ├── config.js
│   ├── database
.
If you already setup mailserver,
then there will be two directory inside the /srv/.
b. Deploy to Docker
Go to inside directory /srv/opensso/
cd /srv/opensso/
Now deploy to docker
docker compose up -d
You can verify it is running with
docker container ls -a
4. Setup Nginx
a. Configure server block
nano /etc/nginx/nginx.conf
Because we want nginx to follow configuration per server block. Just add comment for this,
#include /etc/nginx/sites-enabled/*;
Then save it by press ctrl+x then press y and enter.
b. Create domain.conf
Now create the domain.conf to /etc/nginx/conf.d/domain.conf.
nano /etc/nginx/conf.d/domain.conf
Then paste this
server {
    listen 80 default_server;
    listen [::]:80 default_server;

    server_name sso.yourdomain.com;

    root /srv/opensso/public;

    location / {
        proxy_pass              http://172.17.0.1:3000;
        proxy_set_header        Host $host;
        proxy_set_header        X-Real-IP $remote_addr;
        proxy_set_header        X-Forwarded-For $proxy_add_x_forwarded_for;
        proxy_set_header        X-Forwarded-Proto $scheme;
    }

    # cache all files inside root with expires max
    location ~* ^.+\.(ogg|ogv|svg|svgz|eot|otf|woff|mp4|ttf|rss|atom|ico|zip|tgz|gz|rar|ico|bz2|doc|xls|exe|ppt|tar|mid|midi|wav|rtf|txt)$ {
        access_log off;
        log_not_found off;
        expires max;
        add_header Pragma public;
        add_header Cache-control "public";
    }
}
Save it by press ctrl+x then press y and enter.
c. Make a Test
Make sure your domain.conf is correct.
nginx -t
nginx: the configuration file /etc/nginx/nginx.conf syntax is ok
nginx: configuration file /etc/nginx/nginx.conf test is successful
d. Restart Nginx
When nginx configuration is correct,
then you can just restart the Nginx service.
systemctl restart nginx
Now OpenSSO is running and you can access it through your browser at https://sso.yourdomain.com.
If you still stuck on some part of this guides,
just feel free to email me at [email protected].